Virtual meetings have become par for the course for our hybrid-workforce. From meeting clients to onboarding new recruits and team coffee catch-ups to project presentations, Teams has become a one-stop platform for all of our daily tasks and work interactions. Question is, has your organisation been getting the most out of the app? Teams is multi-faceted and can inject a new lease of life into your virtual workspace. Check out some of the additional features below that make Microsoft Teams a lot more than just an online boardroom.
Change your background / branded custom backgrounds
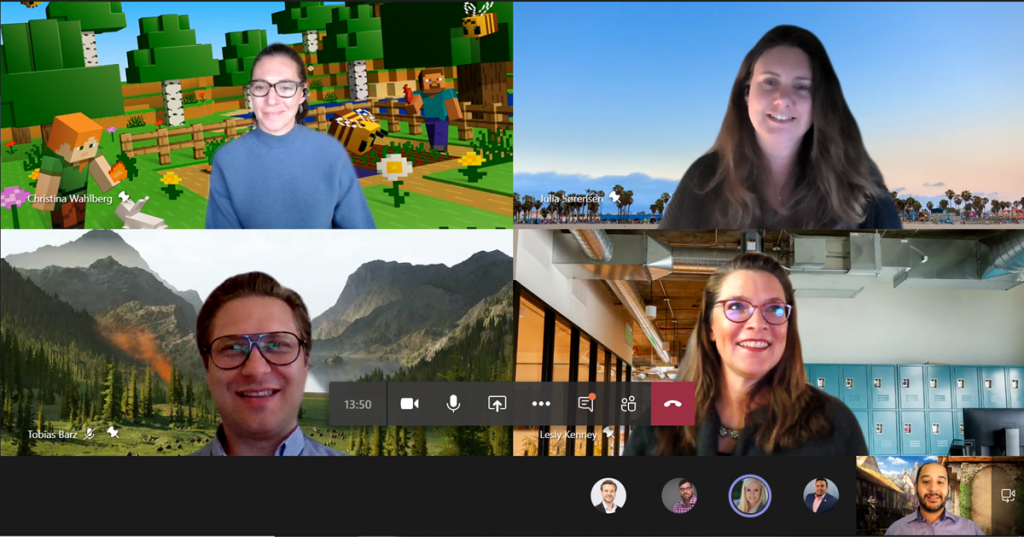
For various reasons, participants in an online meeting mightn’t like the idea of letting others into their homes, even if only virtually. For these cases, Microsoft Teams allows you hide your background environment. You can either add an image or blur out the background entirely. This means that the only thing that other attendees can see is you. If you like, you can upload branded custom backgrounds. This could be an image with your company logo and brand colour. It could even be an image from the interior of your company’s office.
Start using Backgrounds – Before joining a meeting, while you’re setting up your video and audio, select ‘Background Effects’. It’s just to the right of the mic switch. Select ‘Blur’ to blur your background. If you want to use an image, there are many stock images to choose from on the right-hand display. As mentioned earlier, you can also upload your own image.
Whiteboarding
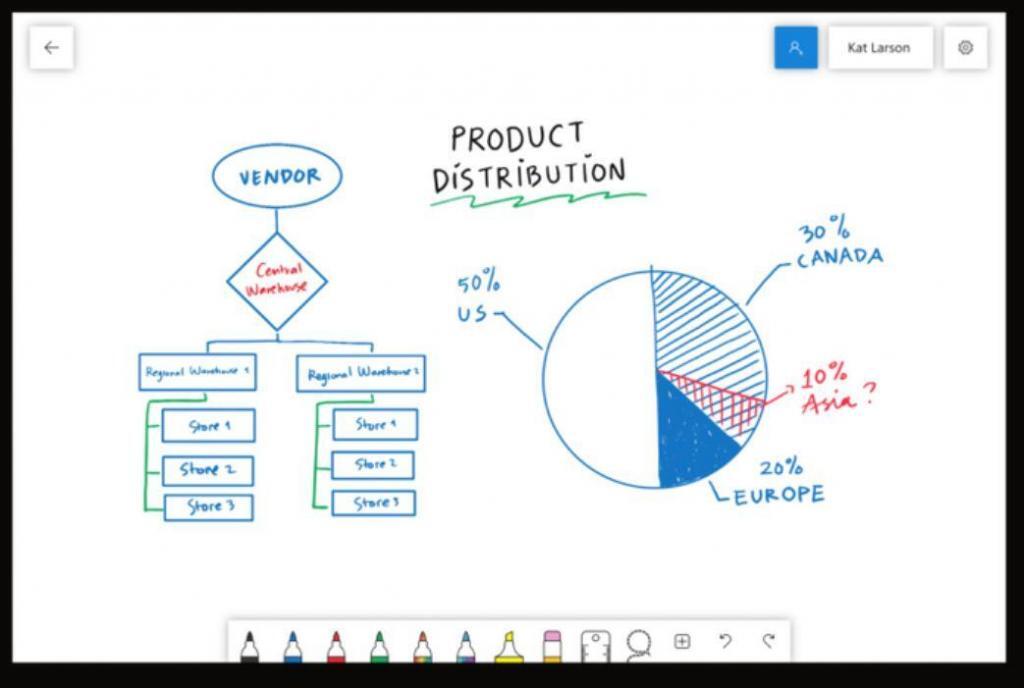
Each Teams meeting has a dedicated whiteboard where participants have space to sketch together. Whiteboards are perfect for brainstorming, sharing ideas and collaborating. All participants are given access to a shared digital canvas where they can draw, sketch or write. After a Teams meeting, the whiteboard is available to all participants from the Teams meeting chat, in a tab labelled Whiteboard.
Start using Whiteboard – After joining the meeting, click the share icon in the share tray of the meeting. Then, in the whiteboard section, select Microsoft Whiteboard.
Raise your hand
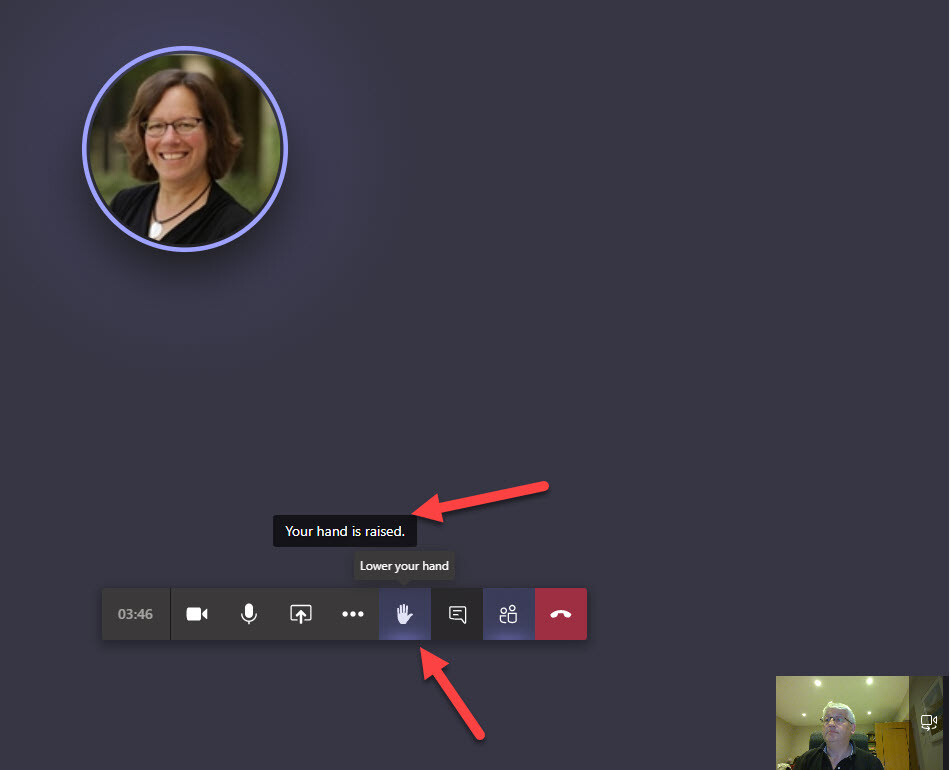
One of the most challenging aspect of running large or org-wide meetings is making sure that attendees aren’t talking over one another. Microsoft Teams offers the perfect solution. At the start of the meeting, the moderator can lay out the terms of the meeting. This includes asking participants to wait their turn and only speak when asked. During the meeting, attendees can then raise a virtual hand to let people know you want to contribute without interrupting the conversation.
How to Raise Your Hand during a meeting – Just select ‘raise your hand’ in the meeting controls. This is represented by a single hand icon. This will notify the host. They can then allow you the opportunity to speak.
Hold a PowerPoint presentation
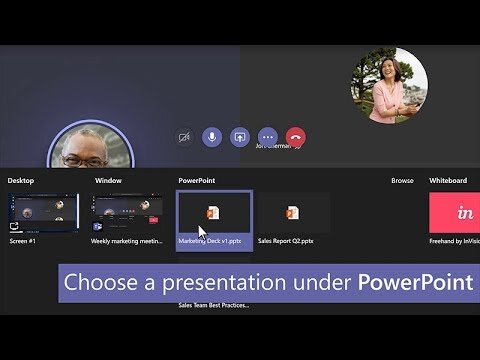
PowerPoint presentations are a common feature of normal office meetings. Sharing PowerPoint presentations is even better on Microsoft Teams. The host can share their screen to the rest of the attendees. If they a sharing a PowerPoint deck, the other attendees have the option to shift back and front between slides without interrupting the presenter. They can then get back in sync with the presenter at the click of a button.
Start using PowerPoint on Teams – To share your screen in a meeting, select ‘Share’ in your meeting controls. This is represented by an icon with a screen and an arrow. Then, choose to present your entire desktop, a window, a PowerPoint file, or a whiteboard.
Breakout Rooms
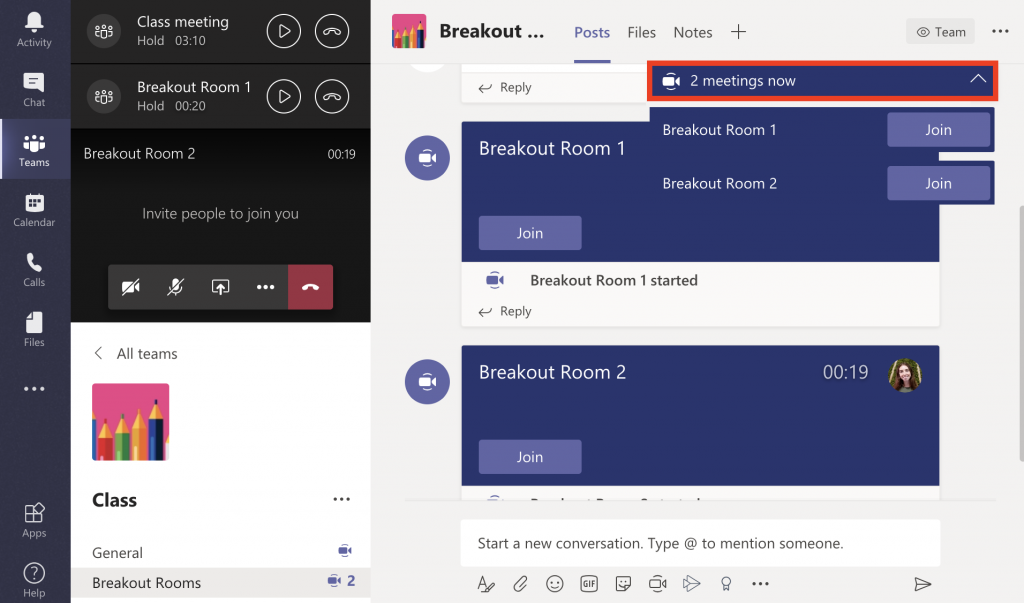
Reap the benefits of one-to-to-one brain storming sessions or focus groups with Breakout Rooms. Organisers can now facilitate meaningful discussions within smaller groups using Microsoft Teams. Users can assign participants, rename each room and use functions in the chat such as ‘make an announcement’.
How to use Breakout Rooms- Start the meeting. In meeting controls, select Breakout Rooms. Select the number of rooms you want (max. 50) and whether you want Teams to assign people to rooms or you want to choose the people for each room yourself. You will then be able to select people to place in each Breakout Room and given the option to rename.
Together Mode

Video calls have become an integral part of how we communicate since we began remote working almost a year ago. One thing remote workers miss most about the office is seeing colleagues face-to- face. Together Mode, a new feature within Teams, places all call participants on a shared background, making it feel like everyone on the call is sitting in the same room together. This can be a great feature to utilise for team virtual events.
Start using Together Mode- Click on your avatar and hit ‘settings’. Enable ‘New Meeting Experience’ and restart Teams to activate this new feature. Once Teams, is back up and running, return to the meeting, click the ‘…’ icon at the top of the screen and select ‘Together Mode’.
Keep ‘Meeting Notes’ during a board meeting
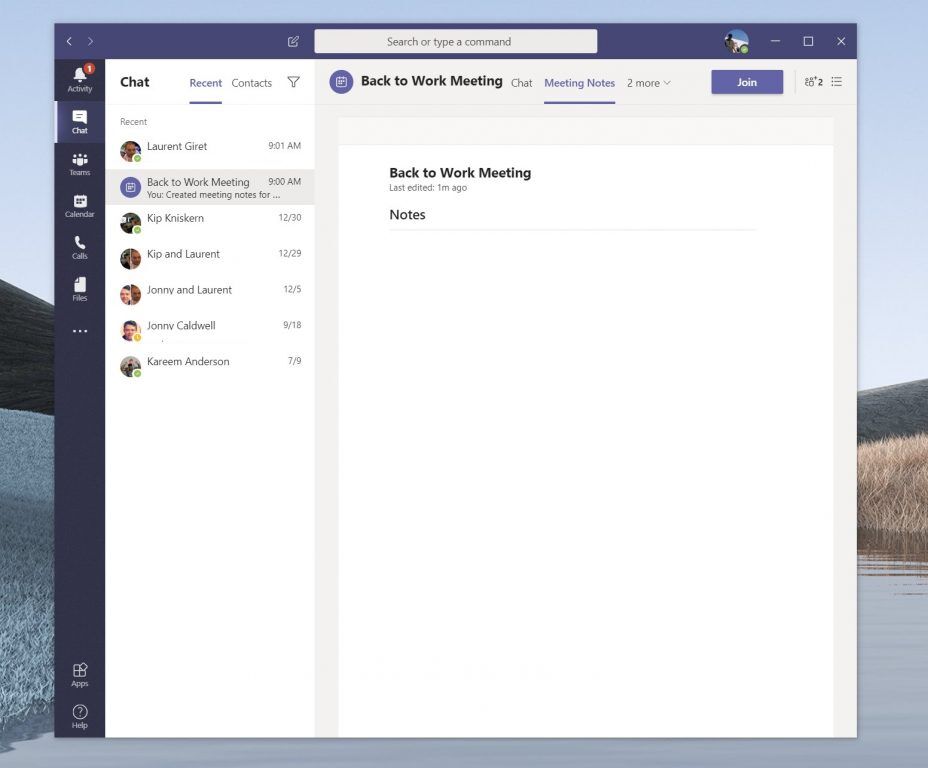
Meeting Notes are a great place to capture and share notes before, during, and after a Teams meeting. Notes can be taken in meeting of up to 100 people and can be sent out to attendees after the meeting.
Start using Meeting Notes – Once you’re in the meeting, go to More actions button in your meeting controls, then choose ‘Meeting Notes’. If you haven’t taken any notes yet, select ‘Take notes’. Otherwise, start typing your notes. Use the controls at the top of the panel to format the text.
Record a Meeting
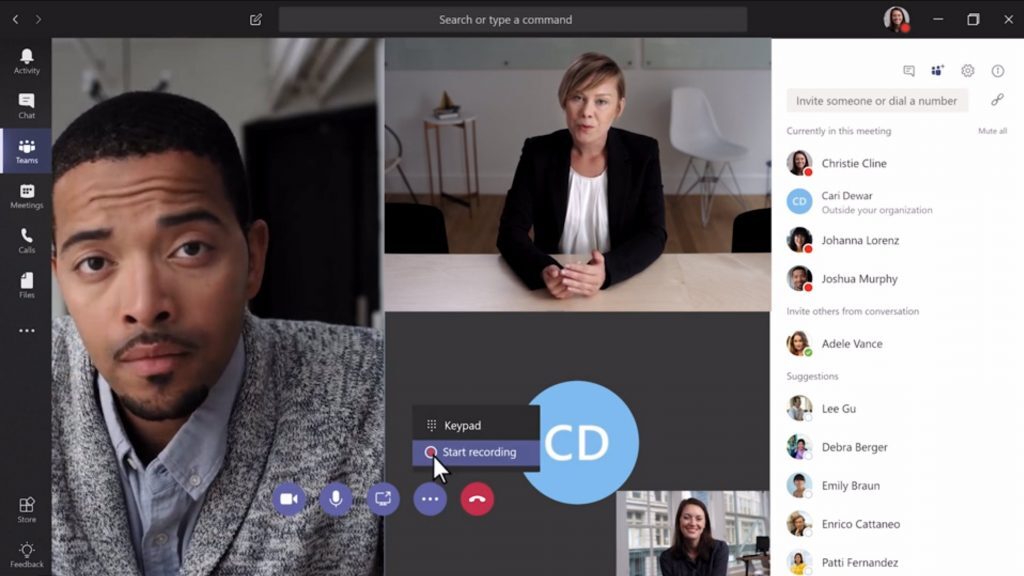
One of the biggest advantages to Microsoft Teams meetings over face-to-face meetings is the ability to record and re-watch your meetings. In real life, this would require professional videographers and multiple cameras to capture the essence of the meeting. When you record on Teams, it is exactly like the live event. This is great for attendees who wanted to look back over a certain topic of discussion within a meeting. It is also perfect for sharing with those who couldn’t attend the live meeting. Those team members can catch up at their own convenience.
Start Recording Meetings – To start recording, go to the meeting controls and select ‘More options’, then select ‘Start recording’. The recording happens in the cloud, and it is saved so you can share it securely across your organisation. All attendees are notified when a meeting is being recorded.
___________________________________________________________________
Want to learn more about Microsoft Teams? –
Are you new to Teams and want to learn more? We’ve answered all the most frequently asked questions in this blog post. Get up to speed on Microsoft’s popular collaboration hub.